This summer, Jill decided to make her own décor/patterns to decorate her classroom. Anyone who knows Jill, knows she is cheap. Her students know one Skittle is generous in her classroom. We are yard sale queens and kings. And, we never, if rarely, hire anyone to do anything we can do ourselves.
Last year, Jill made her own lettering and signage around the room using fun fonts and layering color construction paper using her classroom colors. She got many compliments and inquiries from visitors. This year, Jill moved classrooms and tripled her classroom square footage. SO, lots to decorate this year. Sure Jill could buy cutesy borders at $6 bucks a pop, but she thought she would try her hand at making some. She wanted some black and white florals and patterns to add to her color coordinated room. Once she made a set, Jill thought…”hmmm, I wonder if anyone else would like to customize their own classrooms.”
Hence, A Poor Teachers Dollar Décor line was born. Because we’re cheap, we tend to use a lot of black and white in our classroom designs. We add “pops” of color using construction paper borders, copying on color paper or even hand coloring parts of the designs to make a customized “Stand-out” classroom.
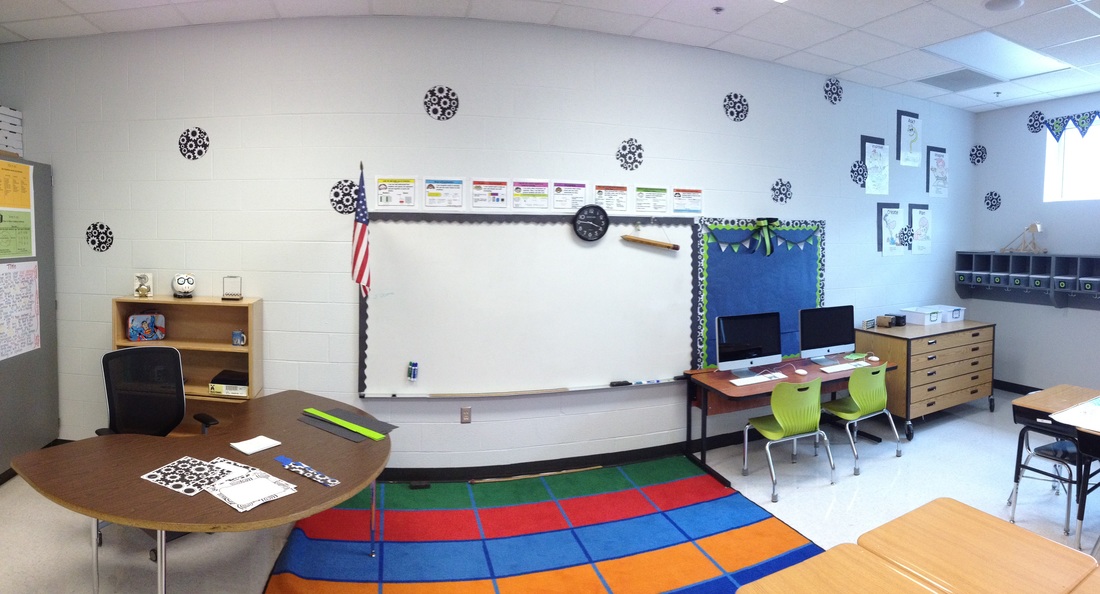
While Jill still can’t get into her classroom yet, she and I attacked my classroom. We decorated it all for FREE this year using the paper I already had and our printer. In about 3 hours my classroom was finished! Now I can focus on planning. See my classroom pictures below.
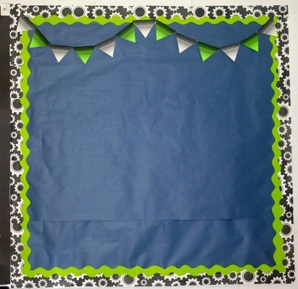
| Borders I couldn’t believe it only took 5 pages for my small bulletin boards. My largest board took 7pages. I didn’t even have to “volun-tell” my teenager to help me! One issue you may face is having to cut off the thin white border. I haven’t figured out how to force my printer to print all the way to the edge. If your printer will…great. If you don’t have solid color borders, you can make your own with construction paper or colored paper and the template in the Theme set. The above border took only a few pages. (each sheet creates nearly 4 feet of border) For example a 4’ x 4’ board, would need only 5 copies! I love the versatility . I can make straight boards if I want too! |  |
How to Make
teps to make:
1. Print/copy 5 sheets of full page design.
2. Trim white border with paper cutter
3. Cut full page design (slide 3) in half horizontally with paper cutter.
3. Print border template (slide 2)
5. Find the middle of the ½ page. (technically this would be the ¼ horizontal line)
6. Place border template. Scallop should lie just over the middle. This one cut will give you 2 borders. So, the ‘hill and valley’ should lay over the middle of the page. I put a grey line on the template to help guide you.
7. I use paperclips/binder clips to hold paper as I cut.
Do not try to cut too many pages at once. It will look too choppy. I recommend cutting 4-5 pages at one time. Remember, one page will yield nearly 4 feet of border, so don’t rush! Think, in two cuts you will be able to cover the perimeter of a 4’ by 4’ board!
Fonts
These definitely took the LONGEST time to create, but were so worth it. My wife and I love all the options to create signs, posters and even kids names throughout the room. I suggest that you create new slides to save your work and leave the page settings intact for future use.
The first font page, says “type here”. These are VERY customizable. All you have to do is type. It will create lower or upper case letters to meet your needs. In addition, you can change the font and fill and even resize. Have fun!
The second font page contains movable images. You can scale them to be as large or small as you want. Simply click on the letter desired, copy and paste into your project. If you want to use a color printer, you can recolor the image too.
Stationary, Labels, Certificates and Desk Tags
Stationary, Labels Desk Tags and Certificates are customizable!! You can increase, decrease or even delete the white space. Simply add a textbox or add images to create your projects!
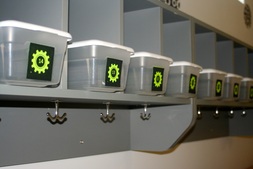
The very last page was created when we put together my room. We needed smaller number labels for the student cubby boxes. After Jill created these, she thought she would add them to all the designs so others could use for cubbies, newsletters, or even a calendar.
Stationary, Labels Desk Tags and Certificates are customizable!! You can increase, decrease or even delete the white space. Simply add a textbox or add images to create your projects!
The very last page was created when we put together my room. We needed smaller number labels for the student cubby boxes. After Jill created these, she thought she would add them to all the designs so others could use for cubbies, newsletters, or even a calendar.
Pennants and Banners
Looking around Pinterest yields so many ideas. I love seeing all the creative clutter-free classrooms. Recently, Pennants and banners are EVERYWHERE. So, we included a few customizable ones in the product. Simply create a textbox and add desired letter or delete the white space for just a patterned ‘art’ look. I decreased the sized of one pennant to create the top of this border and we used a full page size to create a valance over a window.
Looking around Pinterest yields so many ideas. I love seeing all the creative clutter-free classrooms. Recently, Pennants and banners are EVERYWHERE. So, we included a few customizable ones in the product. Simply create a textbox and add desired letter or delete the white space for just a patterned ‘art’ look. I decreased the sized of one pennant to create the top of this border and we used a full page size to create a valance over a window.
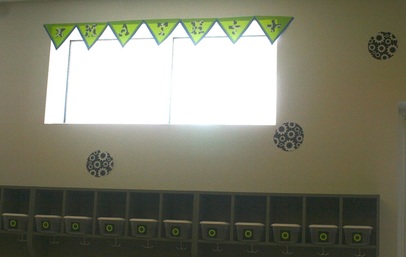
We used the circle gears in the room too to add a little Pop Art and tie in the whole scheme. The trick to using the Pop Art Circle is to ensure a ‘random’ look. Not one circle is lined up with the others.

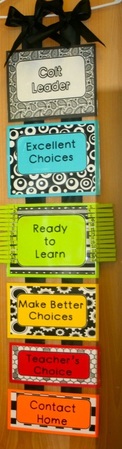
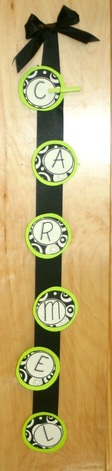
We have been using this behavior chart (well not this exact one) since 1996. Now our whole school has adopted the positive discipline plan. Since the whole school uses the behavior plan, the chart is on a hanger so it can travel with them to Art, P.E., Music or even the Cafeteria. We tied in the stationary from several theme sets. I love that I could tie in the black and white accents. The “Carmel” chart, will be my Specials/Planning Period chart telling students which special class they attend each day. This was made with just the circle art and moving the white circle around a bit. Of course Jill added a cute font to spice it up J
 |  |
Jill and I hope you find great value and inspiration in these products. Please send pictures of your works of art using Poor Teacher Dollar Decor!!!! I’ll link them to this post and send you a digital gift!!
Click on any link below to visit the store site.
 |  |  |  |
 |  |  |  |
 |  |
 RSS Feed
